This article discusses the steps for integrating HubSpot and Discord. For this use case, we will create a ticketing bot in Discord that will integrate with HubSpot for service tickets.
HubSpot is a CRM that brings all your customer management activities under one roof. Discord, on the other hand, is a trusted and popular instant messaging platform with a diverse set of specialized communities.
We will be covering the following in the article:
- Workflow
- Creating a Discord Bot
- Authorizing a Discord Bot
- Setting up the Application Server
- Setting up the Ticket Tool
- Visualizing Tickets in HubSpot
(Feel free to skip to the section of your choice, by simply clicking on it)
Workflow
For a detailed understanding, let’s consider the example of a support ticket system where the customer can create a ticket in discord. The information of the ticket needs to be reflected in HubSpot by the creation of a new ticket, establishing two-way integration between both platforms.
To understand the workflow of this integration and test application, refer to the diagram below:
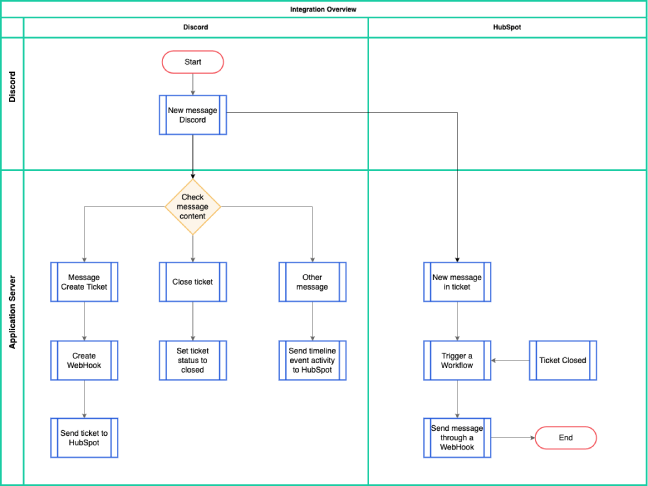
It’s a three-step process with the description of each as follows:
1. Creation of Discord Bot
We need to create a discord bot to cater to the requests of the user and transfer messages between both platforms.
2. Setup of Application Server
The application server handles the workflow of detecting the message type – open ticket, close ticket, and other messages. Afterwards, the workflow is executed accordingly for each of these.
3. Creation of Ticket in HubSpot CRM
Upon the opening of the ticket, a new ticket shall be created in HubSpot. Also, the workflow shall be capable of sending messages via the HubSpot CRM directly.
Creating a Discord Bot
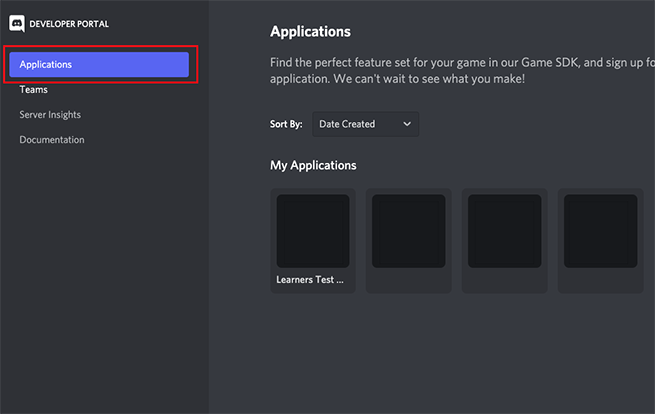
Discord is a very developer-friendly platform. As a first step will be creating a Discord bot, which is essentially creating an application in Discord. Here are the steps to create an application:
- Navigate to the developer portal of Discord. Select Applications from the sidebar.
- Select your application and then click on Bot from the sidebar.
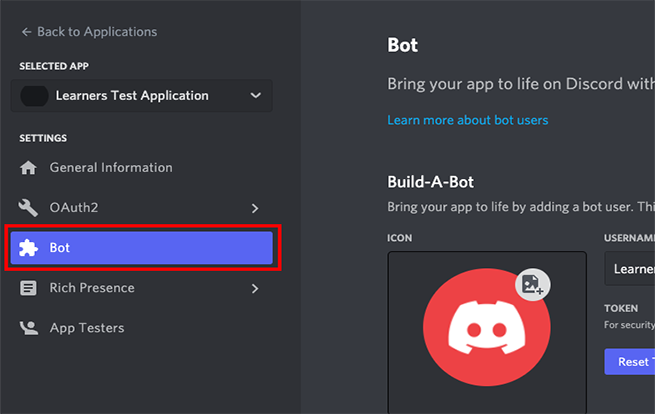
- Assign a username to your bot under the USERNAME input field.
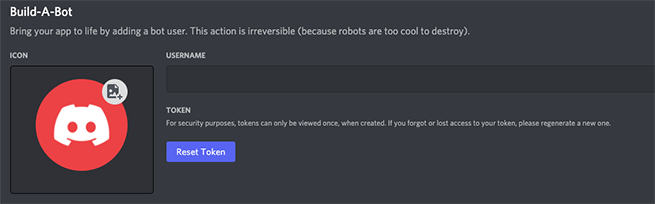
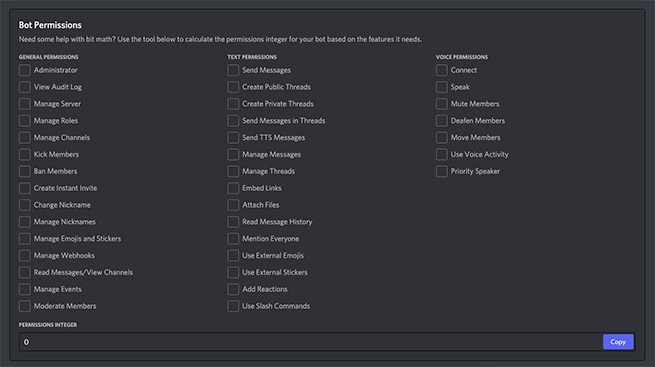
- Upon scrolling, you can find Bot Permissions. Check all the boxes of permissions you need to assign to your bot.
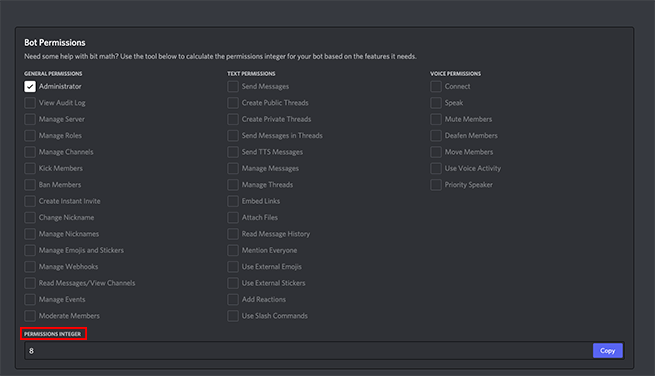
- We have selected ‘Administrator’ in this case. You would notice that a PERMISSION INTEGER is generated that helps in integration ahead by specifying the permission.
- Next is to authorize the bot and for that, navigate to this section.
Authorizing the Discord Bot
After the creation of the bot, you need to authorize it for the utilization of its API in the integration process. To authorize your created discord bot, follow these steps:
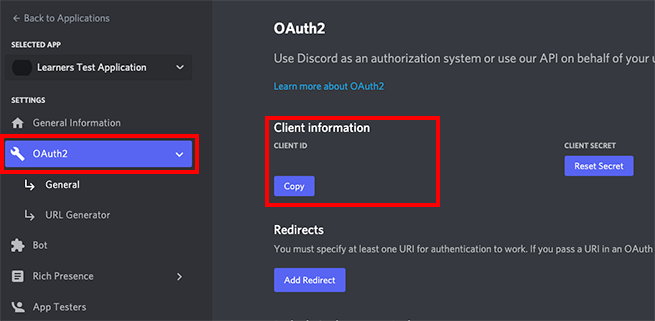
- Navigate to OAuth2 in the developer portal of the selected application. Here you can find the CLIENT ID under the Client information.
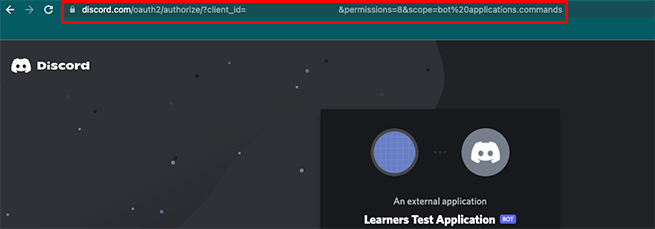
- Go to discord.com/oauth2/authorize/?client_id=<your_client_id>&permissions=<permission_integer>&scope=bot%20applications.commands
- Select the server you want to add the bot into.
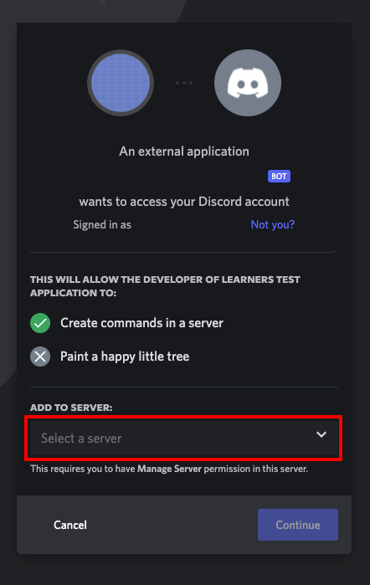
- Click on Continue.
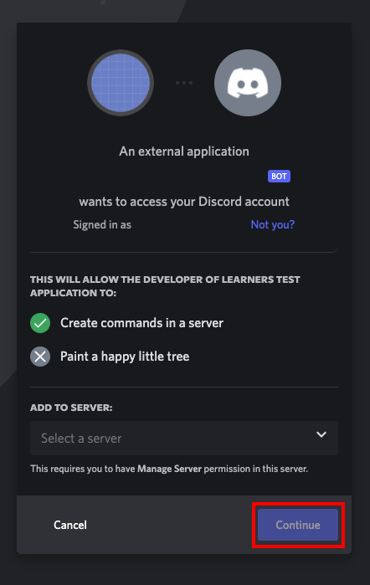
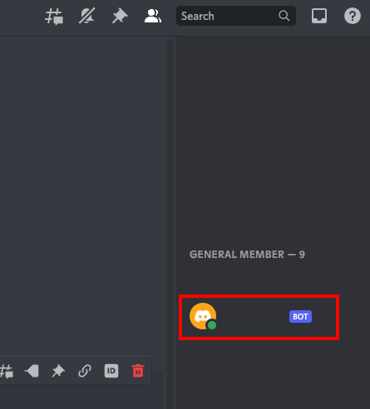
- After that, you will be able to see this bot in your discord application.
Setting up the Application Server
After the creation and authorization of the discord bot, you need to set up an application server and workflows between both platforms. And, following are the steps for it:
- We have python code to handle each of the messaging operations. To make the bot online, the event handler of on_ready is created.
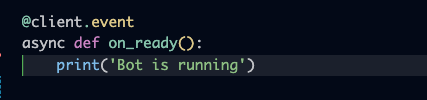
- Once you run this code, you will see that the bot has started running.

- You can confirm the bot turning online from your discord application as well.
- Next up, you need to set up the ticket tool. Navigate to the section of setting up the ticket system for this purpose.
- After the set-up, you need to have the on_message event handler to detect the ticket closing and other messages.
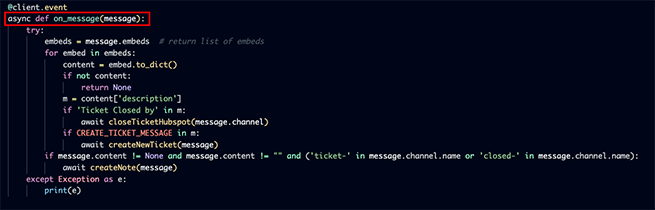
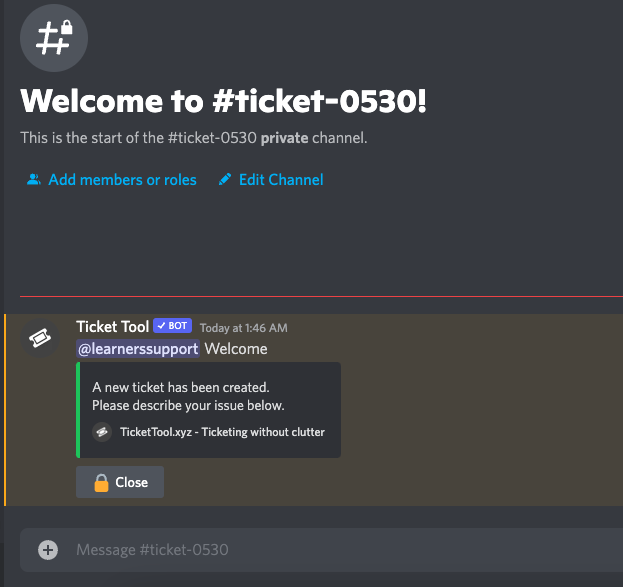
- You will see that a default message is sent to the ticket upon its creation.
- For linking the messages with HubSpot, you need to create the webhook. It is created under the createNewTicket event handler.

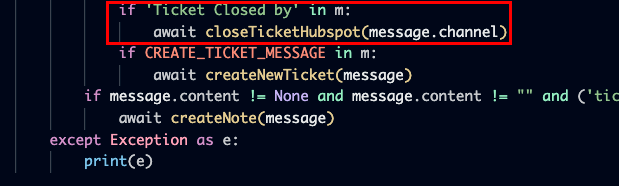
- Similarly, the event handler for closeTicketHubspot is created that closes the ticket in HubSpot upon receiving this event from Discord.
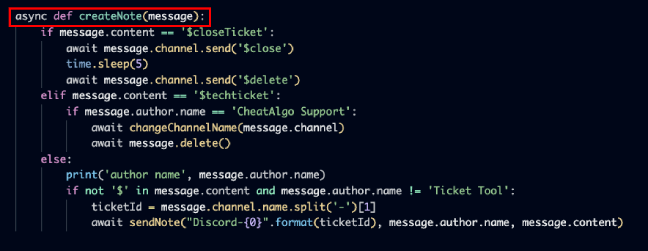
- Afterwards, the createNote event handler is written for sending the messages along with the author’s name to the HubSpot.
- Lastly, the changeChannelName code is written to complete this setup.

Setting up the Ticket Tool
For this application, we will be using a third-party tool, named Ticket Tool to handle the process of tickets. The steps of setting up the tool are as follows:
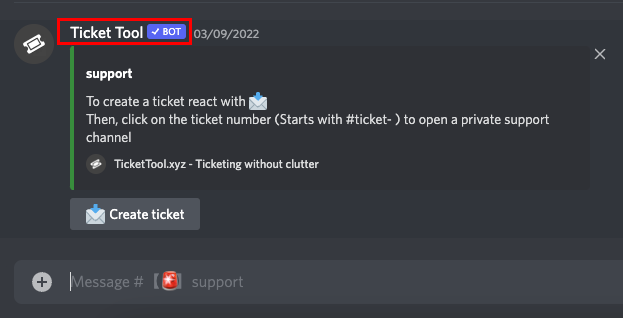
- Here you can see how the Ticket Tool appears in your discord application.
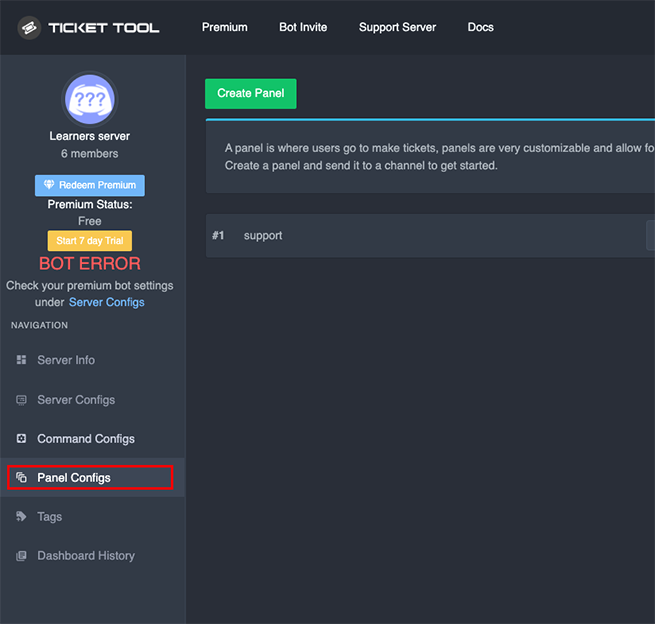
- To set it up, go to the Ticket Tool. Navigate to Panel Configs.
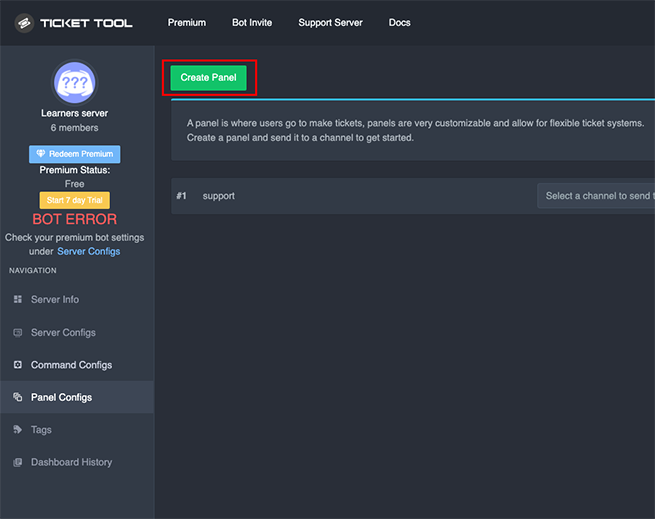
- Click on Create Panel.
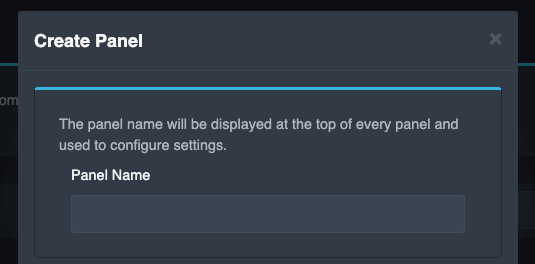
- Enter the name of a panel under the Panel Name input field.
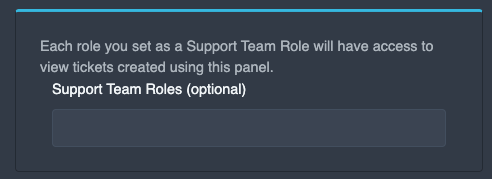
- Select the permissions of the support team under the Support Team Roles input field.
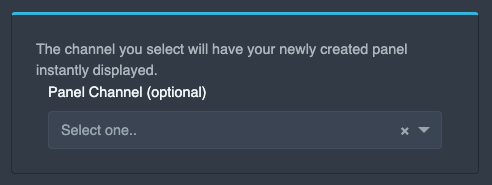
- Select the channel from the Panel Channel dropdown.
- You will be able to see the created setup with the name of the channel which in this case had been kept as ‘Support’.

- Click on Create ticket to create a new ticket in the discord application.
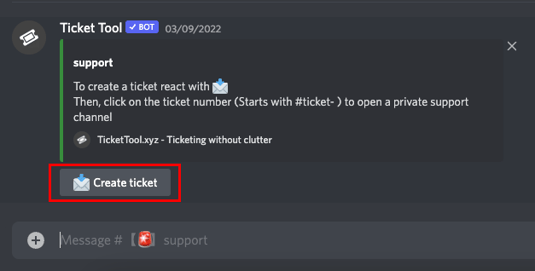
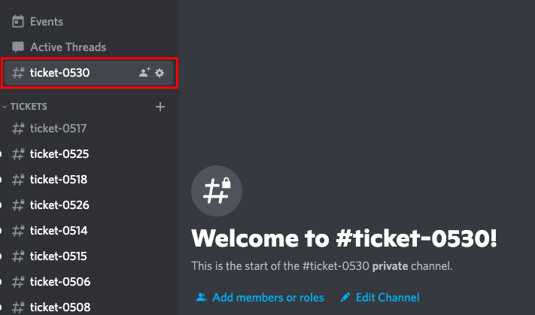
- You will see a new ticket with a unique number assigned to it.
- This completes the Ticket Tool setup.
Visualizing Tickets in HubSpot
After all the setup, it's time to look into how these tickets are created in HubSpot along with the workflow. For that, the steps are as follows:
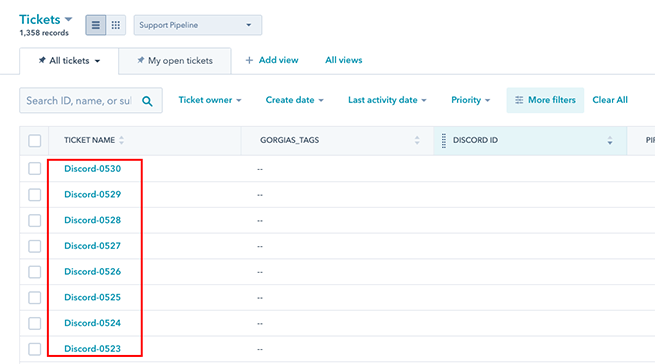
- Go into your HubSpot account and click on Tickets.
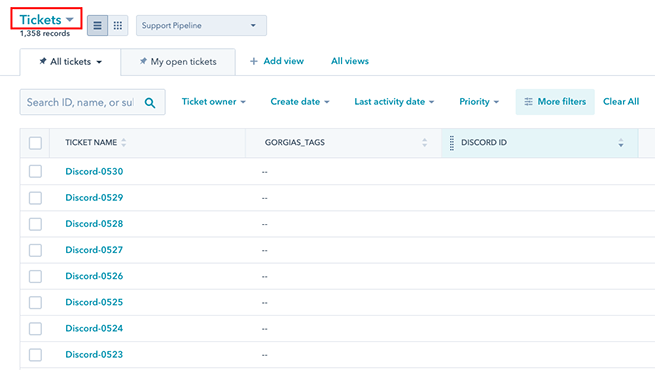
- Here you can see the tickets with the starting name of Discord. These are the ones created by Discord into the HubSpot based on the workflow.
- Once you open any of the tickets, you can see all the details relevant to them.
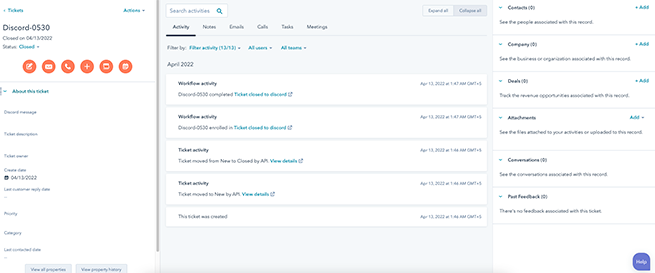
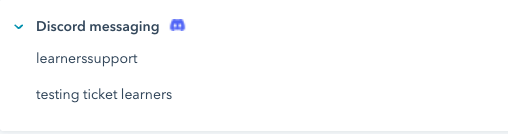
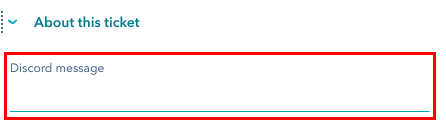
- You can see the messages of that ticket under the Discord messaging panel.
- To reply to the ticket, you can write your message under the Discord message input field.
- And, this is what the workflow in HubSpot looks like. It’s about the closing of tickets. The particular workflow, upon detection of its closing from discord, executes a custom code.
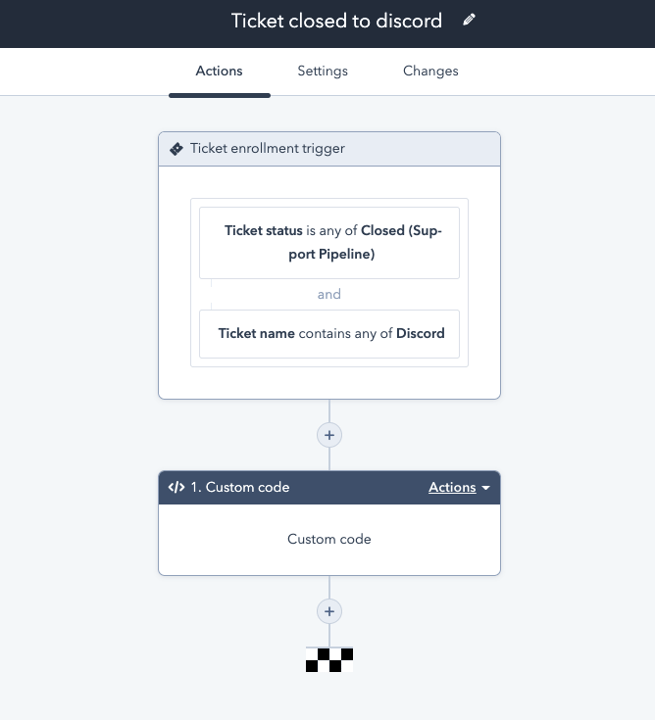
- This is what the custom code looks like. It looks for the content to be ‘$closeTicket’ to detect the closing of it.

- That's all about it!
Conclusion
This article discussed the details of integrating HubSpot and Discord. We considered an example of a ticket system, set up using Ticket Tool to understand this two-dimensional connection between both platforms.