This article discusses the best practices and processes for setting up the integration between HubSpot and Salesforce
HubSpot and Salesforce are popular CRM platforms and it is quite common for companies to use both of these platforms together for specific features. Let’s consider an example of an organization using HubSpot for marketing automation and Salesforce for all the sales pipelines and management.
The client’s integration objective is to capture leads in HubSpot and send them over to Salesforce when the leads convert into an opportunity. Once the opportunities result in a close-lost or close-won deal, the integration transfers the information back to HubSpot. If the opportunity is lost, it can be passed through a marketing nurture sequence as an Marketing Qualified Lead (MQL). At the same time, HubSpot must correctly reflect a won deal’s dollar amount in the HubSpot database.
Moreover, with the HubSpot and Salesforce integration, they intend to receive more accurate and comprehensive lead intelligence and revenue reporting. For this purpose, we will be covering the following in the article:
- Phases of Integration
- Steps of Integrating HubSpot and Salesforce
- Salesforce Dashboard in HubSpot
- Editing and Creating fields in Salesforce and HubSpot
- Error Resolving in HubSpot and Salesforce Integration
(Feel free to jump to the section of your choice by simply clicking on it)
Phases of Integration
There are four steps to follow in a standard implementation, especially when integrating HubSpot and Salesforce. These steps include Planning, Analysis, Design, and Data Mapping. The steps are necessary because the actual integration is not challenging, but all that goes before it makes it a demanding project. These steps are:
Planning
This is the initial phase and answers some of the fundamental questions about the project. These aspects may include:
- What are you trying to do?
- Who are you doing it for?
- When do they need it done?
- Some basic idea of how you are going to do it
- Conducting project and resource planning
- Making list of all the stakeholders you need to talk to.
This sums up the particular phase of planning. For the current scenario, we have talked to all the stakeholders, VP of Marketing, VP of Sales, Chief Revenue Officer, and Customer Success teams to lay down an overall picture for us that we will be discussing in the analysis phase with its visual representation.
Analysis
Once you have the list of stakeholders and required information from the planning phase, it’s time to map out all the business processes between the two systems, making the interaction between the platforms easy to understand. The best method for this is through visual representations like workflow diagrams.
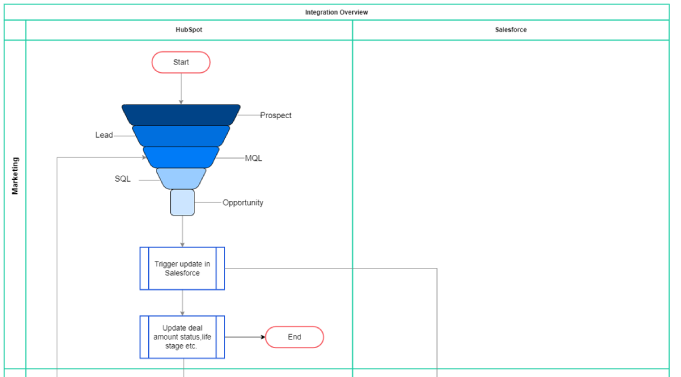
The workflow diagram below provides an overview of the integration between the two platforms as well as the two teams: Marketing & Sales.
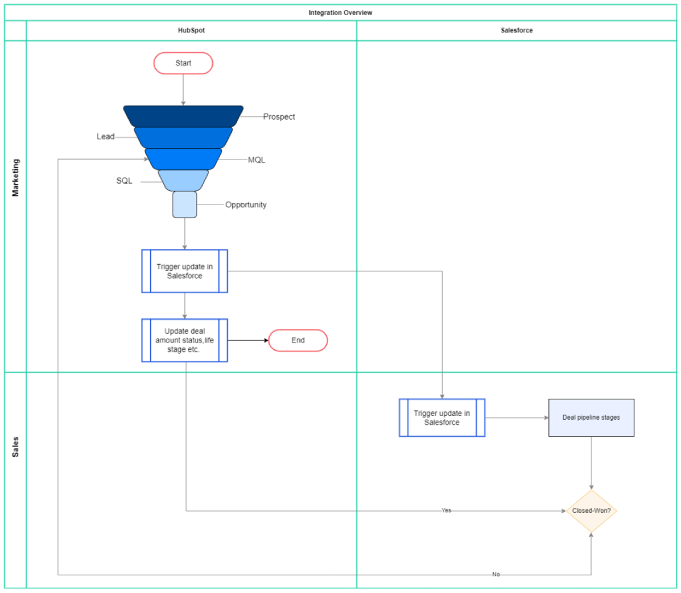
The columns represent the two systems whose integration is discussed: HubSpot and Salesforce. At the same time, the rows represent the department, such as Marketing, Customer Success, and Sales. Let’s understand this workflow in the design phase.
Design
The design phase dictates how you build what you have laid the blueprint of in the analysis phase. It deals with the design of overall architecture and data flows. To understand the whole architecture and data flows of the system under study, the steps are as follows:
1. In our example, a customer begins their sales funnel journey by visiting the website or viewing a digital marketing campaign executed within HubSpot. The Sales and Marketing departments need to be on the same page while qualifying leads. You can define the MQL and SQL standards in a Service Level Agreement to outline how both the departments should work together. Lead Scoring can also be defined to automate how leads progress through the various Lifecycle Stages. In the sales funnel, a lead is converted to an MQL, proceeding towards SQL, and then converting to an Opportunity.
2. When the Marketing team converts the Lead to an Opportunity, the Marketing department wants to record the Opportunity in Salesforce so that the Sales team can get in touch with them either through a meeting or walk them through the sales pipeline stages specific to their business. Once the Opportunity has passed through the sales pipeline, the deal is either closed-lost or closed-won. The deal status needs to be transferred back to HubSpot in either case.
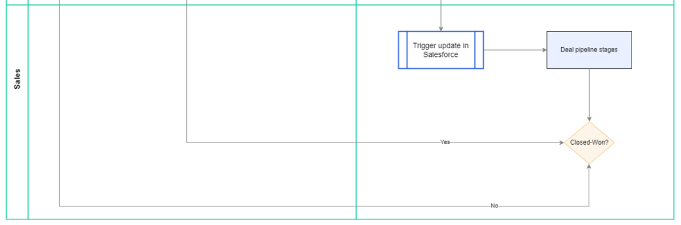
3. In the case of closed-won, the integration intends to trigger an update to HubSpot with the deal amount and other relevant details on the new customer. In the case of closed-lost, the integration plans to update HubSpot with deal status, lifecycle stage, and whether the contact/company needs to be nurtured further for future.
By now, we have done almost 80% of the hard work, and is time to proceed to the mapping stage.
Data Mapping
The last phase is Mapping, where you deal with the exact property mappings between both the systems. This phase can be overwhelming at times because of the different aspects involved in it. Here is a HubSpot+Salesforce Integration Template you can use to make the process of mapping easy and simple.
Let’s apply the template of mapping according to the example under discussion:
Overview
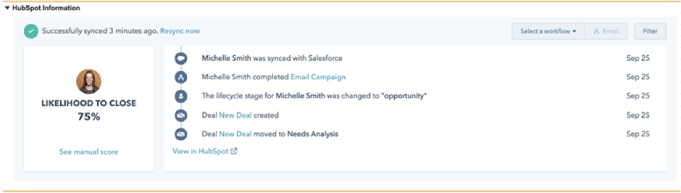
The images below describe the setting of being able to view the HubSpot information into the Salesforce:
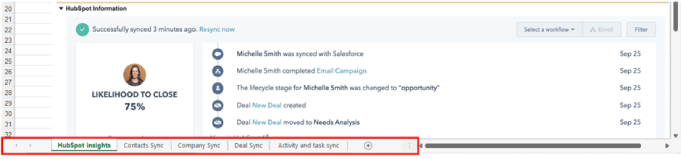
- This is your HubSpot activity record.
2. And this is your Salesforce detailed record.
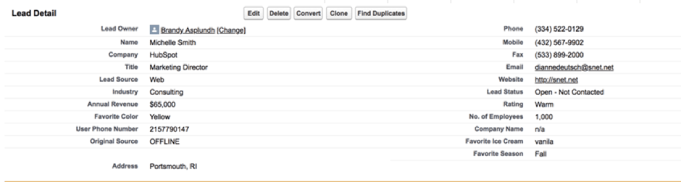
It breaks down the customer-related information into the Salesforce customer record. The information includes entities such as Lead Owner, Name, Company, Title, Lead Source, and many more.
Objects
- You can sync information based on four objects according to your use case. These objects include Contacts, Company, Deal, Activity and Task as shown below:
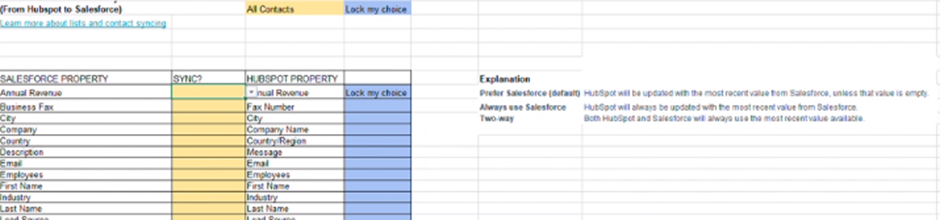
- Contact Sync includes information about the mapping of Salesforce properties of contacts to its relevant HubSpot properties.
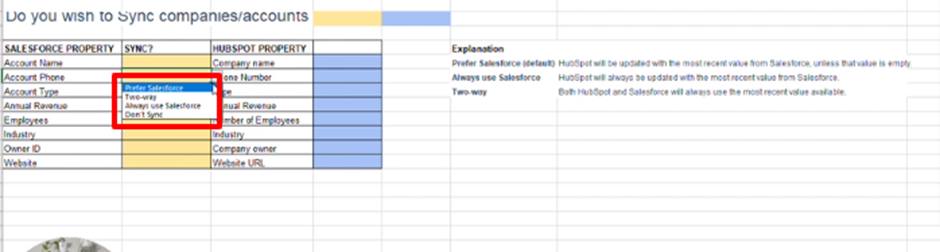
- Company Sync, similar to the previous one, includes information about the mapping of Salesforce properties of the company to its relevant HubSpot property.
- In Activity and task sync, you can map the HubSpot event to its subsequent Salesforce Task Type.
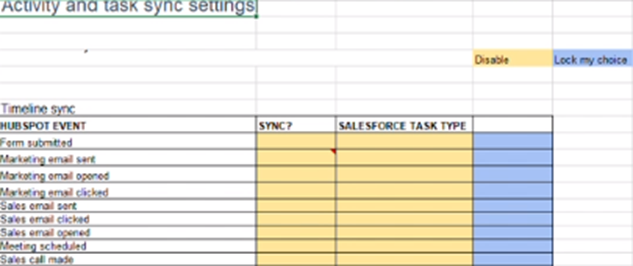
Notice for each object, you have some options to choose from in the form of a dropdown under the column of SYNC? and cell beside the HUBSPOT PROPERTY.


Let’s take a look at what these keywords mean:
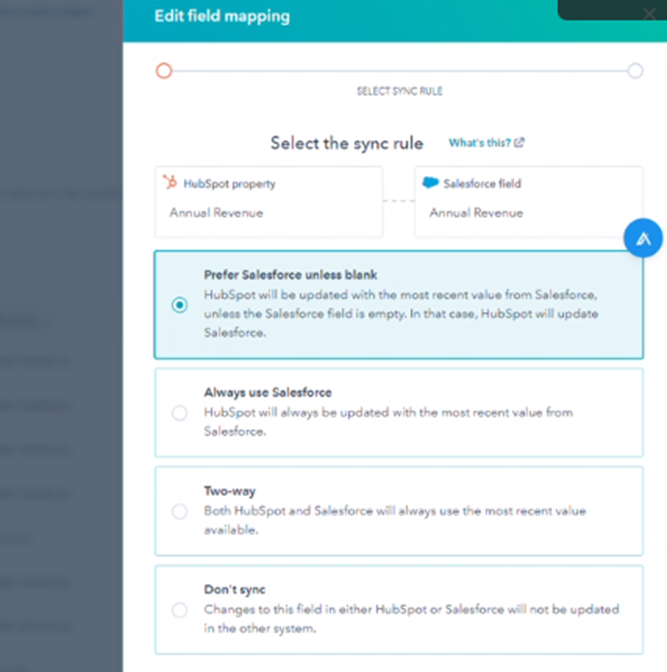
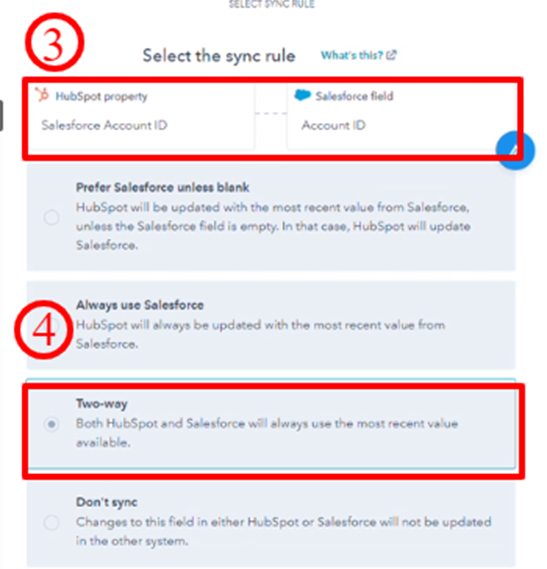
- Prefer Salesforce – It means either if there is a blank value on HubSpot or value existing on both platforms, choose the Salesforce one.
- Two-way (sync) – It takes into consideration the values on both platforms.
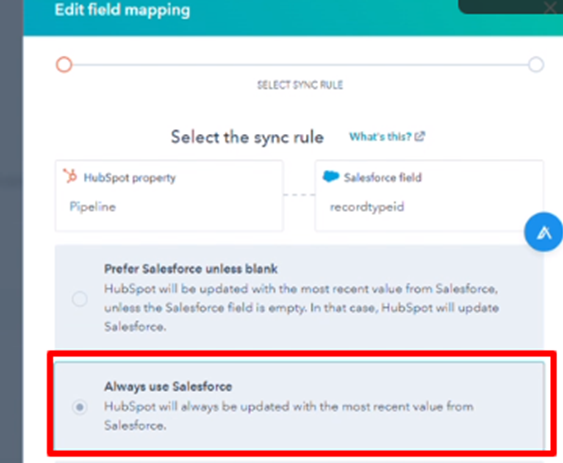
- Always use Salesforce – It represents that the value on Salesforce shall be used, despite the status of value on HubSpot.
- Don’t sync – It defines that the values between both platforms shall not be synced.
- Need to discuss – It deals with the status of the discussion with stakeholders as in if they want to discuss something more with you or your team internally, you will choose this option.
- Lock my choice – It represents that the choice discussed with the stakeholder has been finalized and shall be locked as it needs no more discussion.
This template covers all the basics, but you can always add more details to it, as per the use case. These spreadsheets function as communication and collaboration tools. This completes all the pre-requisites for the integration, time to move ahead with the actual integration steps of HubSpot and Salesforce.
Steps of Integrating HubSpot and Salesforce
The best practice for integration is to start with the test account and use Salesforce Sandbox until all the data is finalized. To set up the integration between two platforms, follow these steps:
- Navigate to your HubSpot account. Go to Settings. Select Connected Apps from the Integrations.
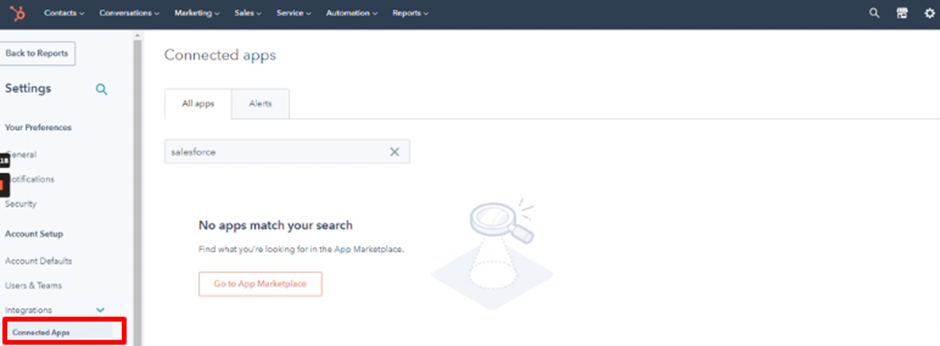
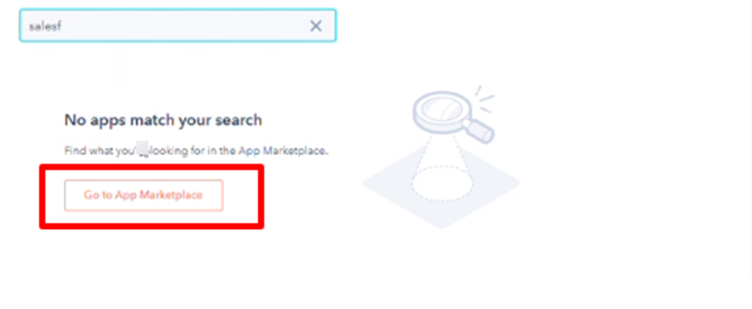
- Search for SalesForce and you can see no app matches the result. Click on Go to App Marketplace.
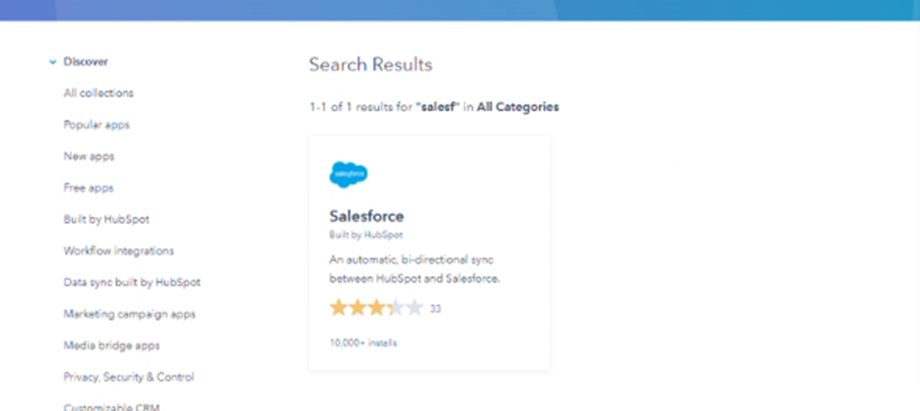
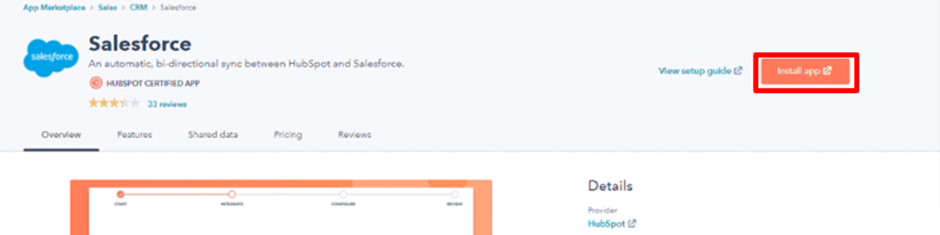
- Click on Salesforce shown in the App marketplace.
- Select Install app which will direct you to the steps of integrating both of the apps.
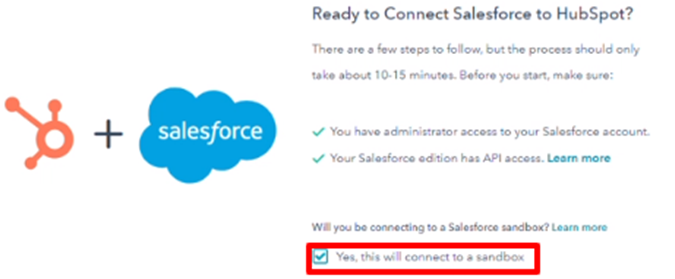
- Check the box saying Yes, this will connect to Sandbox.
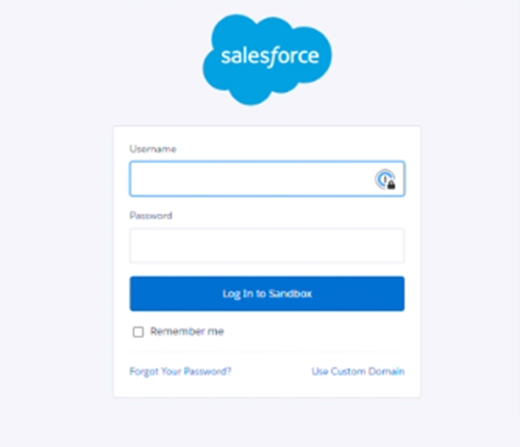
- Login to your Salesforce, using your sandbox account.
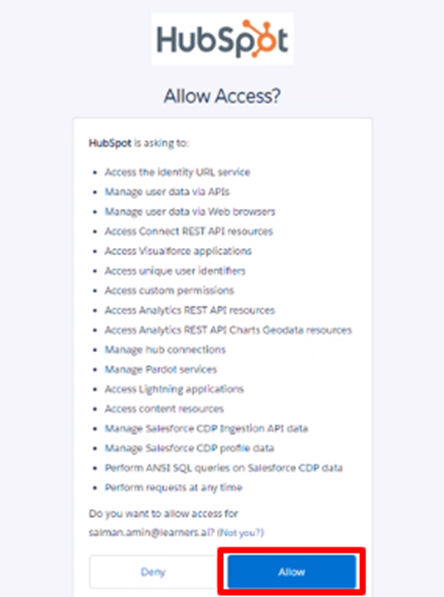
- After logging in successfully, you will see a prompt asking for the access. Click on Allow.
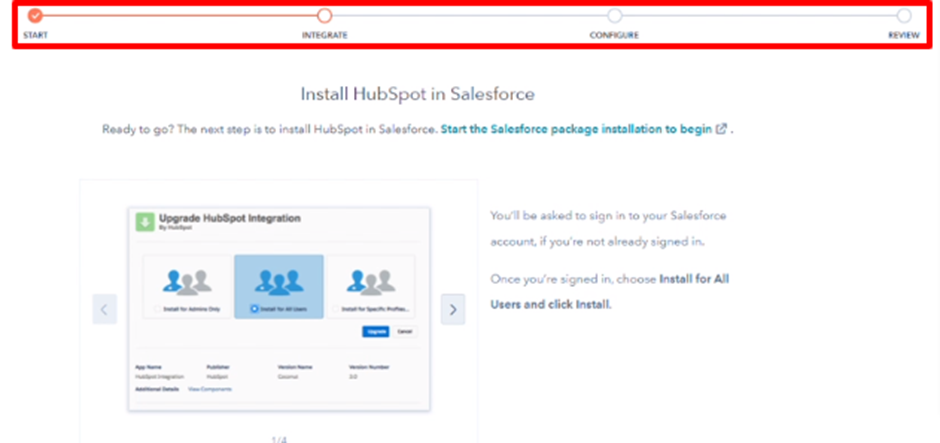
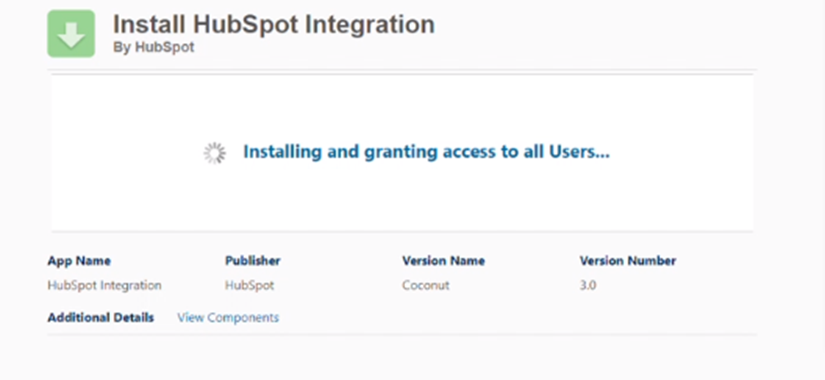
- It will start the installation process based on some steps as shown below:
- If you see an error regarding the installation, navigate to Error Resolving in HubSpot and Salesforce Integration for its solution.
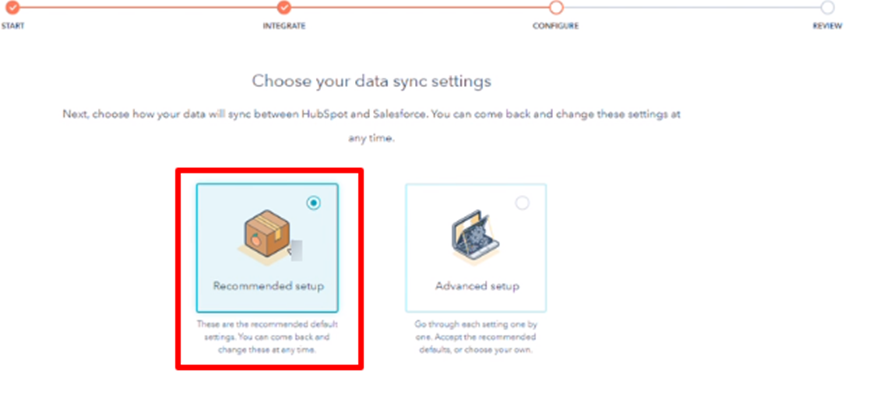
- After the installation is completed, you can choose your data sync settings. We will be choosing Recommended setup in this case.
- It marks the completion of installation and integration.
Salesforce Dashboard in HubSpot
After the successful integration, you will be able to see a nice and complete dashboard of Salesforce in HubSpot.
Let’s look into its details.
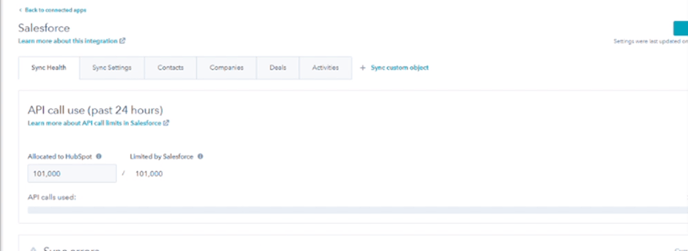
Sync Health
This tab shows the details of the occurrence of any errors, synchronization reports, and duplicate records (if any).
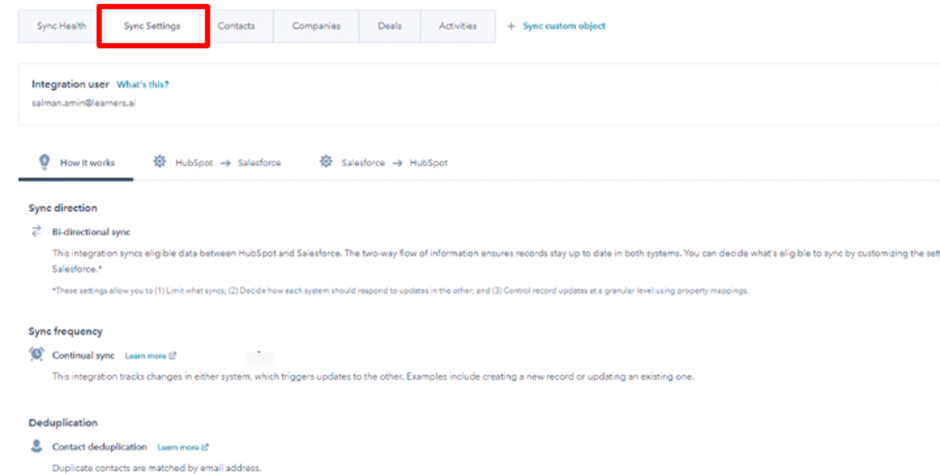
Sync Settings
It holds distinctive information about the settings and is composed of three child tabs.
- Under How it works, you can find detailed information.
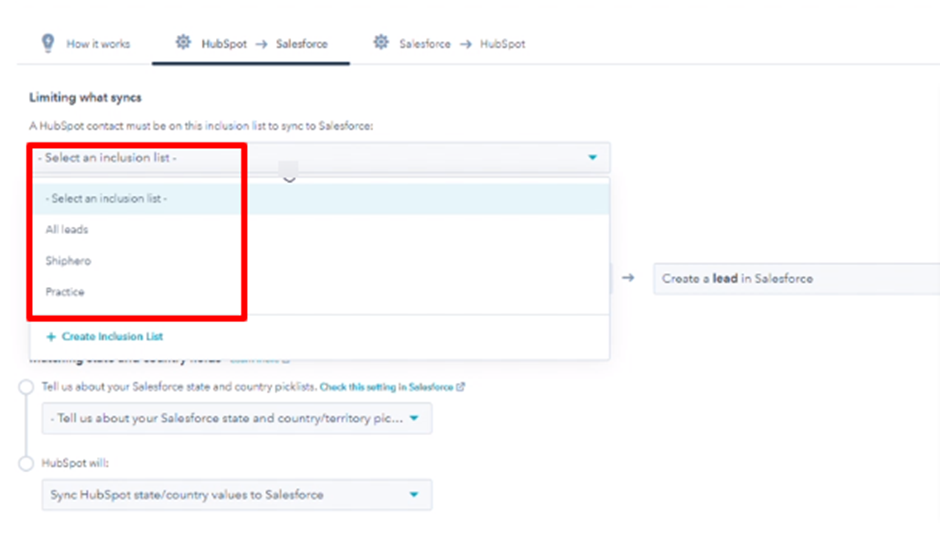
- HubSpot to Salesforce tab consists of an inclusion or exclusion list. You can always choose the contacts you prefer to synchronize with and those you don’t. For example, if you have existing customers, you do not want to target your marketing campaigns, you can create a list here.
- When a HubSpot contact is created/updated, we choose Create a lead in Salesforce.
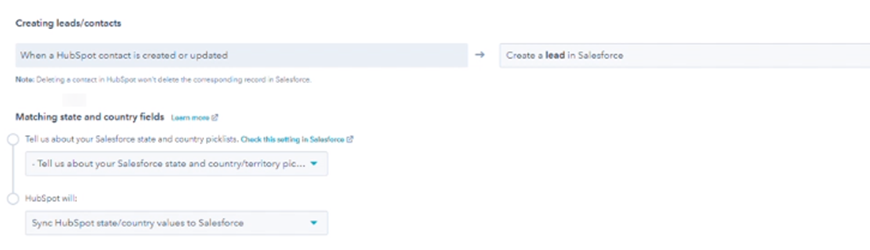
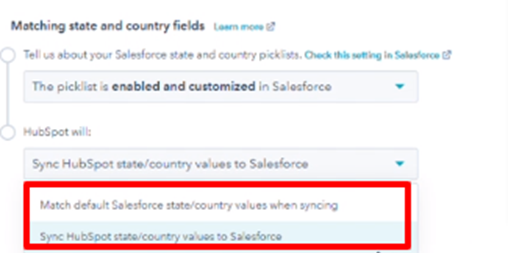
- You can opt for various integration options. If you choose enabled and customized in Salesforce, then you can choose between Match default Salesforce state/country values when syncing or Sync HubSpot state/country values to Salesforce.
- Under the Salesforce to HubSpot tab, you can update the leads and define the set of rules for it.
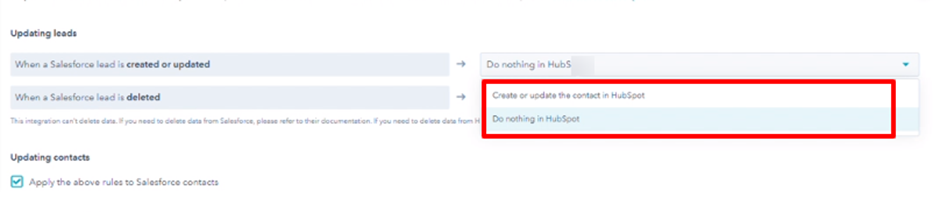
- You can also Adjust lifecycle stage of a contact in HubSpot.

- After setting up these options, you can start editing and creating fields as per the metrics and aspects discussed in the spreadsheets. For that, navigate to the heading of Editing and Creating fields in Salesforce and HubSpot
Editing and Creating fields in Salesforce and HubSpot
There are four fields that you can create based on the object types, discussed in the pre-integration phase such as Contacts, Companies, Deals, and Activities.
Editing Fields
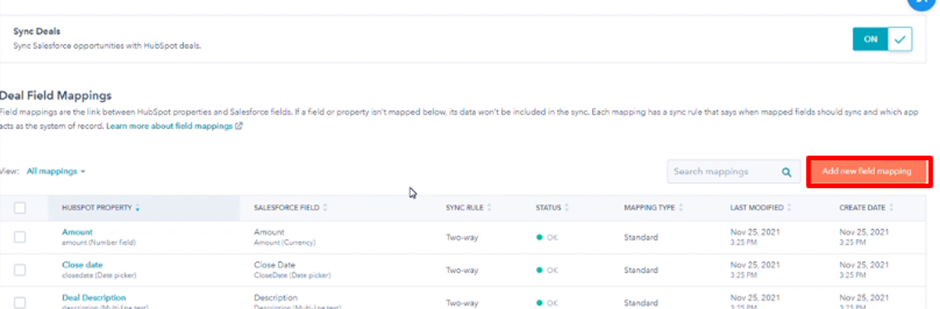
- Click on Contacts and you can see all the contacts along with their HUBSPOT PROPERTY NAME, SALESFORCE FIELD, SYNC RULE, STATUS, MAPPING TIME, and more.
- You can edit any of these fields by clicking Edit. Select the sync rule which in this case has been Prefer Salesforce unless blank.
- For the Deals, you can do the same. You may select the different sync rule such that of Always use Salesforce.
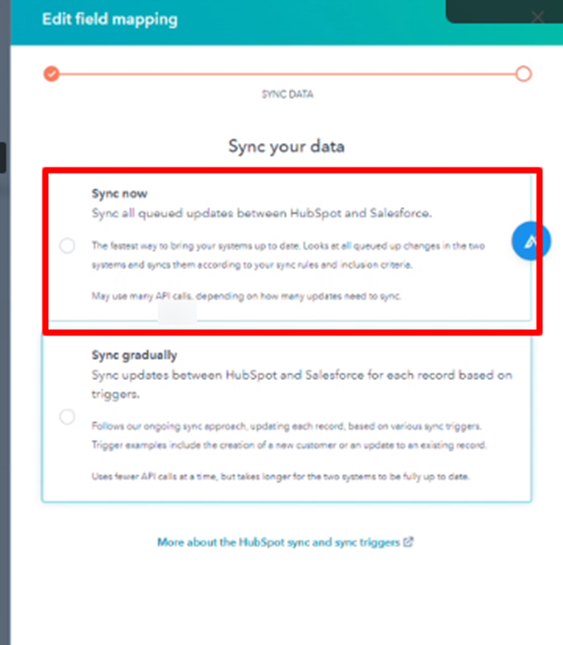
- After that you can select the sync timing or frequency, you may say. We have selected the option of Sync now.
Creating Fields
For creating new fields, the steps are as follows:
- Click on the button of Add new field mapping.
- It will take you to the Create new field mapping prompt.
- Choose the HubSpot property and Salesforce field from the respective dropdown.
- Select the Sync rule that is Two-way in this case.
- Select Sync now.
- And, you are done.
Error Resolving in HubSpot and Salesforce Integration
During installation, you may end up seeing an error, something like:
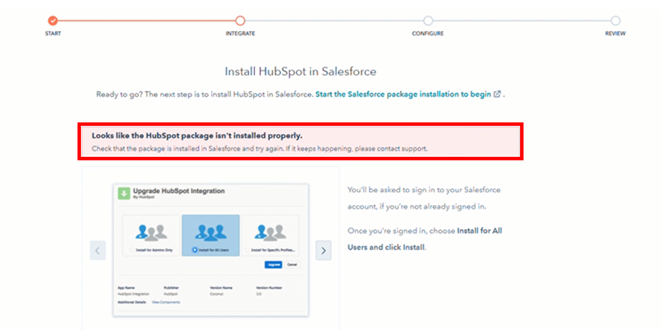
To resolve this, follow these steps:
- Click on Start the Salesforce package installation to begin anchor link and it will redirect you to the Salesforce page.
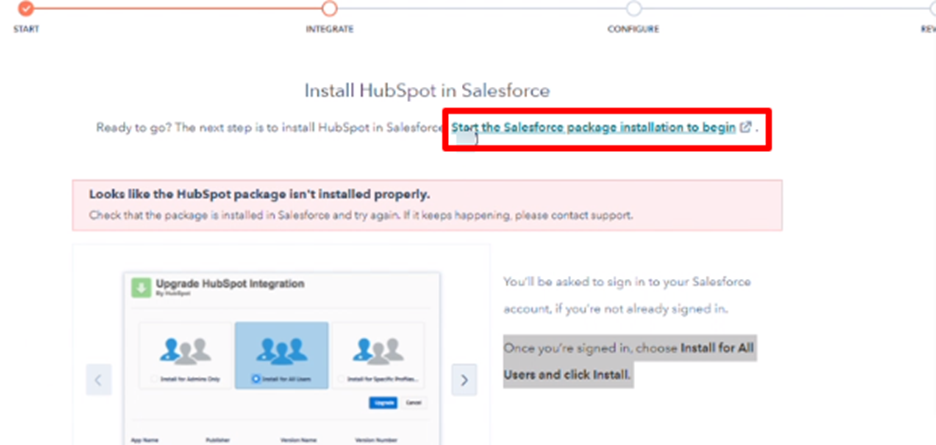
- Log in to your Salesforce account.
- A prompt will appear asking for your approval. Check the box asking for access and click on Continue.
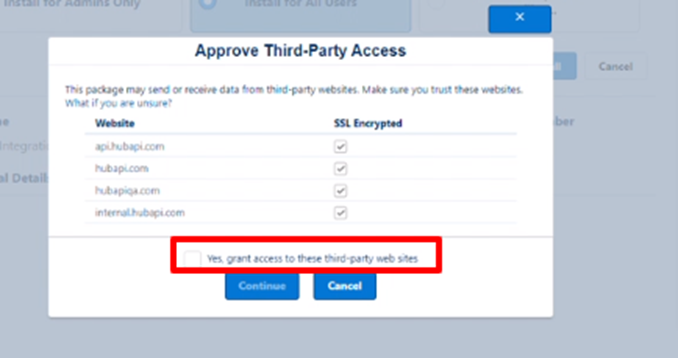
- It will start the installation and grant access to all users as shown below:
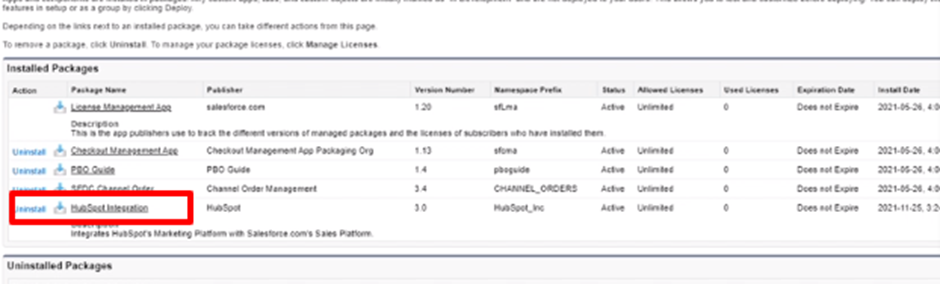
- Once the installation is complete, you will be able to see the package under the Installed Packages.
- You can continue from Step 10 of Salesforce and HubSpot Integration.
Conclusion
In this article, we went through the detailed steps for integration HubSpot with Salesforce. If you map out your use case well in the pre-integration phase, the integration phase and setup of fields are nothing more than a few clicks.